How To Photograph The Northern Lights
Photography Tips - How to Shoot Winter Landscapes and the Northern Lights
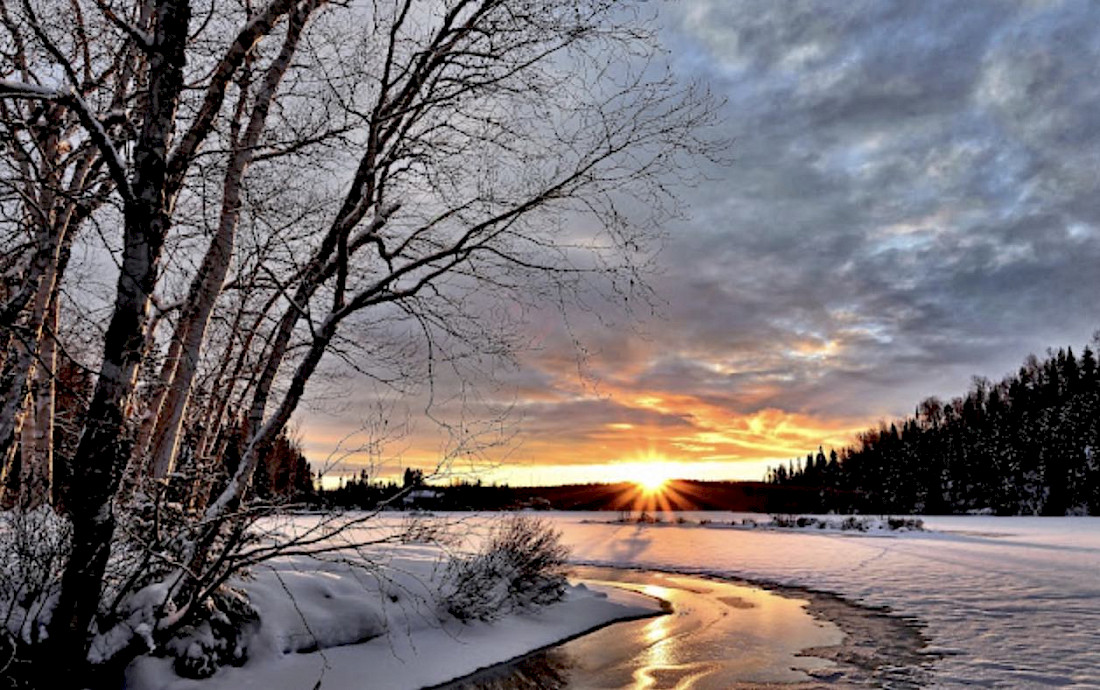
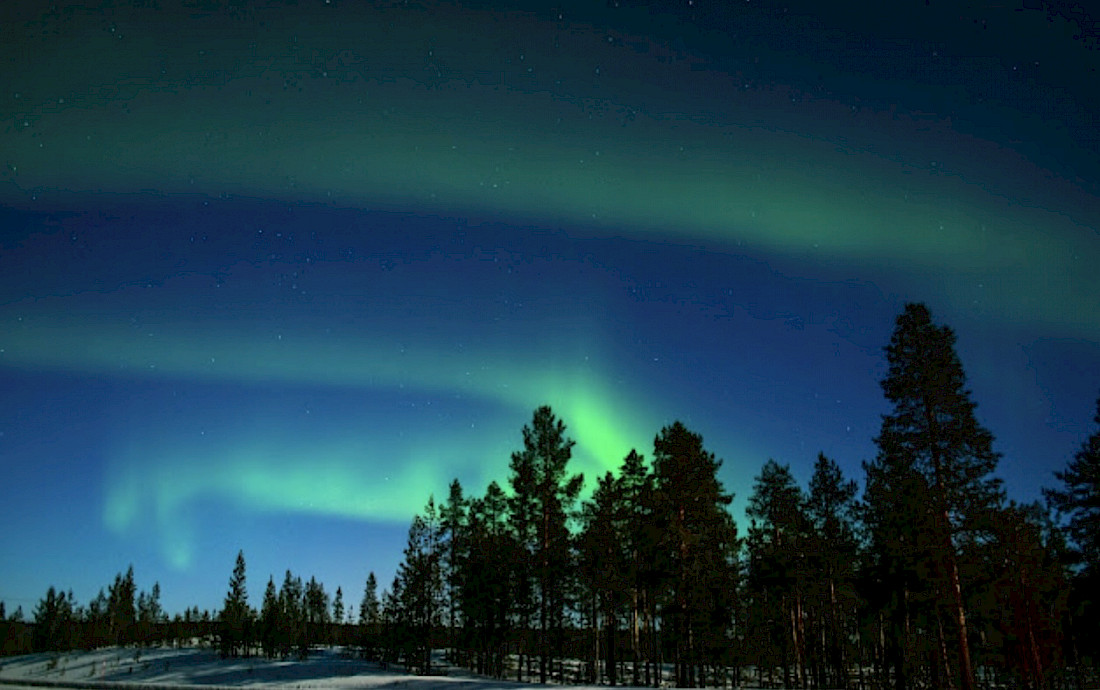
Winter’s monochromatic landscapes are magical. Even if you don’t consider yourself a shutterbug, the unique beauty of the Winter Carnival in Quebec, the great glaciers of Alaska, the Northern Lights of Iceland and Finland, and the Christmas Markets of Europe offer a special allure. There is little doubt that you will pull out your camera or phone to capture the dazzling winter pageantry of these once-in-a-lifetime destinations.
Winter photography’s palette plays with light, composition, and Mother Nature’s artwork, snow and ice. Knowing what to consider when shooting in the winter will help you turn an ordinary scene into one that is picturesque. If you are planning to visit any of these destinations, we have put together a few helpful tips and suggestions that will turn your photos from frigid and static to fabulous and memorable.
Dress for the Weather
Although this seems obvious, make sure that you bundle up! There is nothing more distracting than trying to shoot and being cold! By keeping warm and dry, you will be able to focus better on that great winter shot! If you are visiting northern Finland, Lapland, and Iceland, you might want to consider getting toe and hand warmers, and don’t forget to wear your thermals. As for gloves, wear glove liners that are touch-screen compatible under warm mittens. When shooting if you take your mittens off for the sake of dexterity, your hands will still be warm in the glove liners.
Cold Saps Energy
Although you can use a cell phone, a good quality DSLR camera is best for winter photography because you can manipulate your settings. Always carry an extra set of fully charged batteries and a charging device for your phone. The cold can suck the life out of your camera’s batteries in the blink of an eye. And, a pro tip is to try to keep those extra batteries, as well as your phone warm by keeping them in your pocket or next to a warmer in an insulated bag.
Temperature Changes
To avoid problems let your camera acclimate to the temperature. Keep your camera and batteries in a well-insulated bag when not using them to protect them from the cold. As a rule of thumb, put your camera in a plastic bag with a moisture collector when going inside from the cold. Let your camera slowly warm up to room temperature before opening the bag to avoid internal condensation that can wreak havoc with your camera.
Exposure
Snow can be tricky so getting the right exposure is critical. Due to its reflective nature, snow can sometimes trick your camera into overexposing the subject. In this case, the snow appears to be white with no recognizable details. You can overcome this by either underexposing your subject or using a polarizing filter that will allow you to capture more detail. If you don’t do this your camera’s built-in meter will set the scene that will result in underexposure making the snow look dirty. Another trick is to use your flash to brighten the scene.
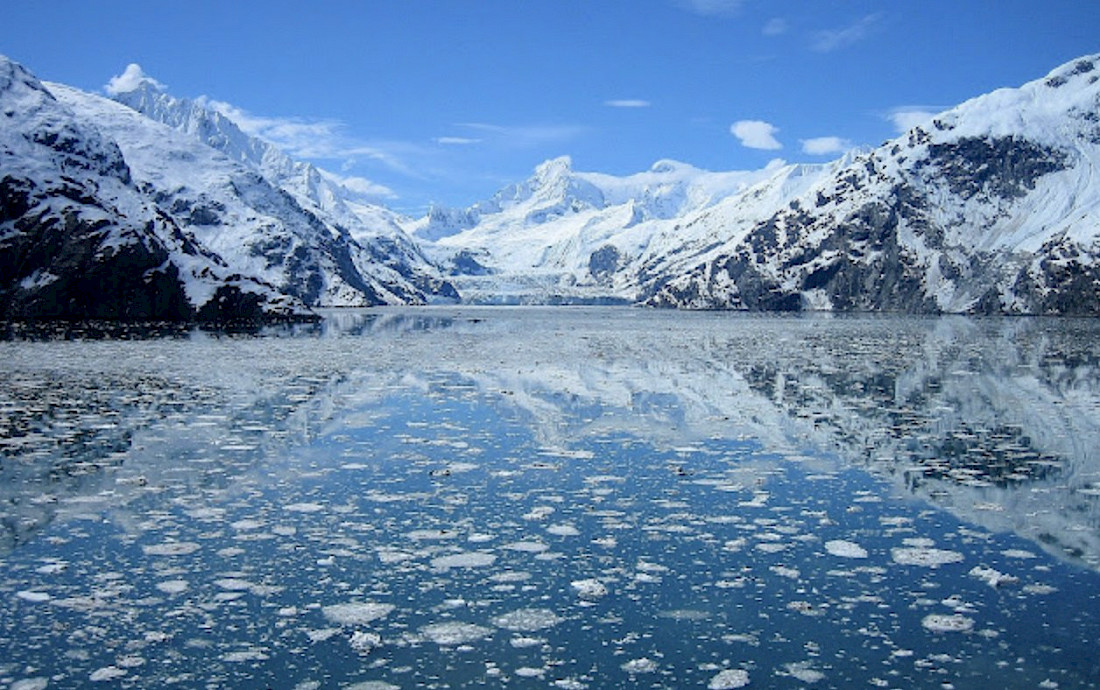
Shooting Snow & Glaciers
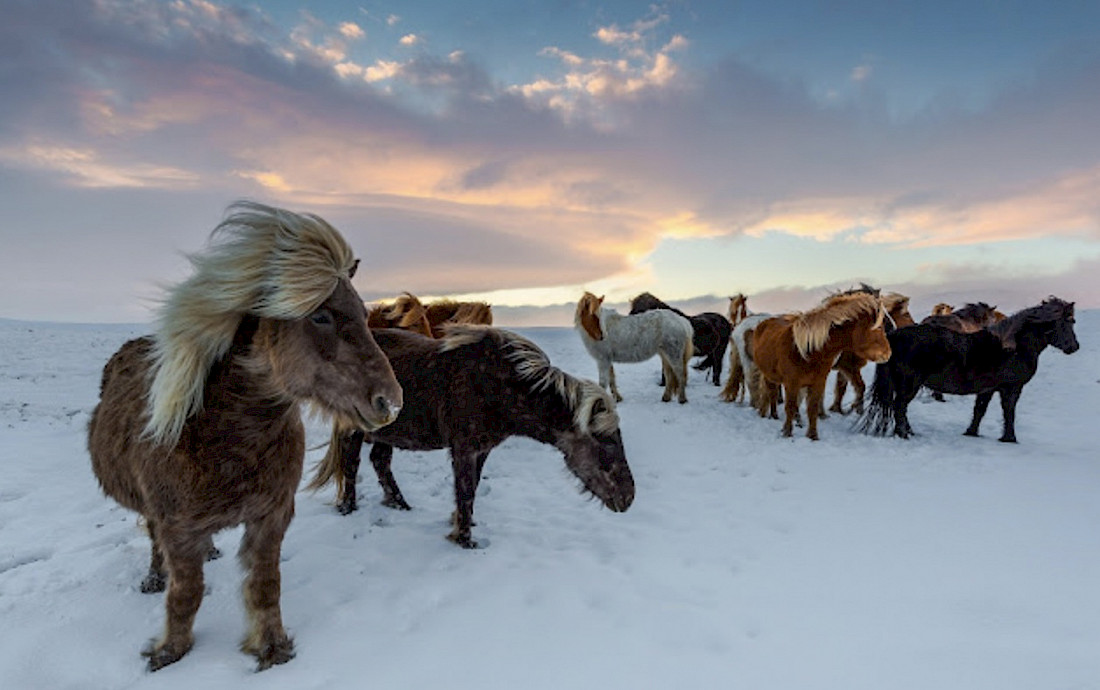
White snow acts as a natural reflector, bouncing light onto subjects creating a soft light. Unlike the harsh light of a mid-summer day, winter light, also known as “blue light” is soft and more diffused making people and objects appear in a less luminous more flattering glow. Winter light is ideal for shooting landscapes and portraits because of the natural diffused light especially in the hours just before sunset or just after sunrise when winter light is at its most magical. Always remember that snow is monochromatic, so look for a little bit of color to make your image pop. Consider framing your snowy landscape with trees, rocks, a colorful jacket, or an animal. If you add a subject in your foreground, it will add depth and interest to your image.
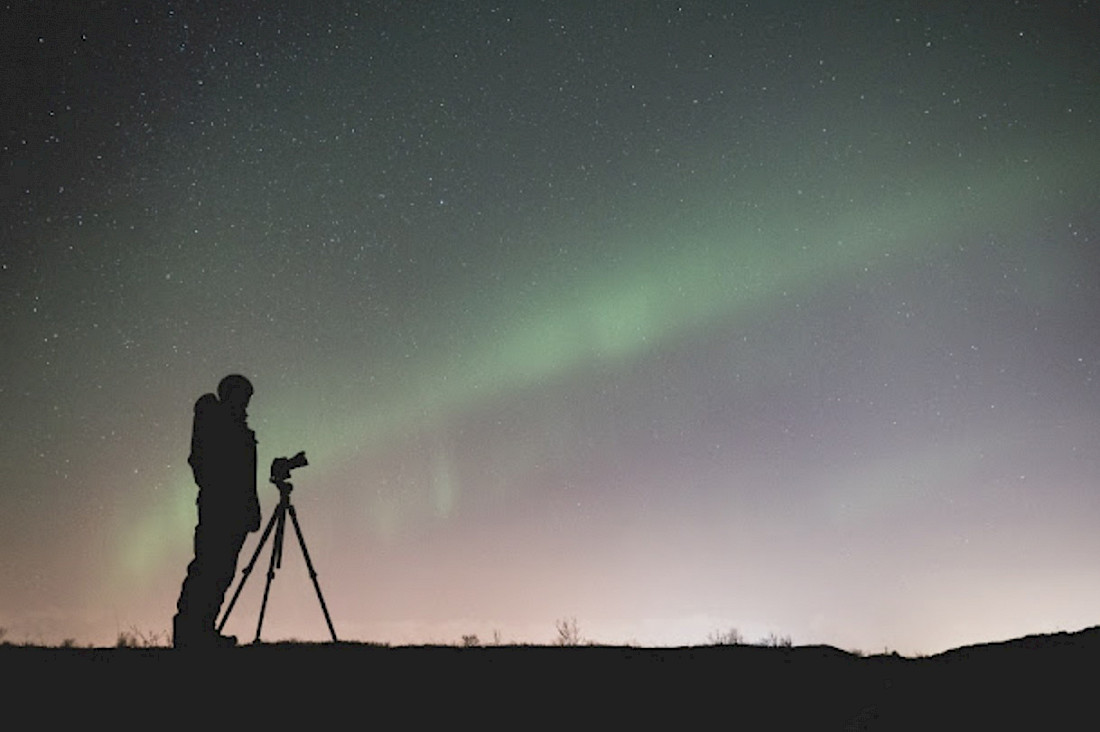
Shooting the Northern Lights
Aurora photography is difficult. To prepare for when the lights might appear it is best to get an aurora forecast app that tracks them. The Aurora Borealis can move quite fast depending on conditions, so always be ready to shoot! You can take photos of the Northern Lights with your phone if it is capable of long exposures. If you are using a DSLR camera a wide-angle zoom lens with settings of at least f/4 is the best. Make sure to set your camera to manual. Your ISO should be between 800 and 1600, the shutter speed should be around 5 to 15 seconds, and the focus should be set to infinity. A pro tip is to set up your camera as much as possible when you are indoors so you don’t have to fumble around with the settings in the dark. And, don’t forget to put the camera down and watch the magic happen without staring at an LCD screen!
Christmas Markets and Quebec Winter Carnival
There is no question that the best time to shoot the Christmas Markets in Europe and the Winter Carnival in Quebec is when the sun goes down and the lights are twinkling and glowing. These festive events come with so many photo opportunities because of their amazing atmosphere, activities, lights, colors, and decorations. Favorite shots for the Quebec Winter Carnival include the parades, the ice sculptures, and the Bonhomme Ice Palace. When taking Christmas lights, if you want less sparkle, use an F/4 setting; if you want more sparkle try an F/16 setting. Don’t be afraid to experiment. Some basic rules of thumb are to turn the flash off, set your camera to manual, and keep the ISO around 200-400 to let just enough light into the lens. Shoot Raw images so you can make adjustments in Photoshop. If you want to shoot people and the atmosphere of the market, use a wide aperture such as f/4 and raise your ISO to make the image brighter. If you are worried about long exposures either with your phone or camera, rest them on walls or other objects to keep them steady.

Contrasts, Details, and Composition
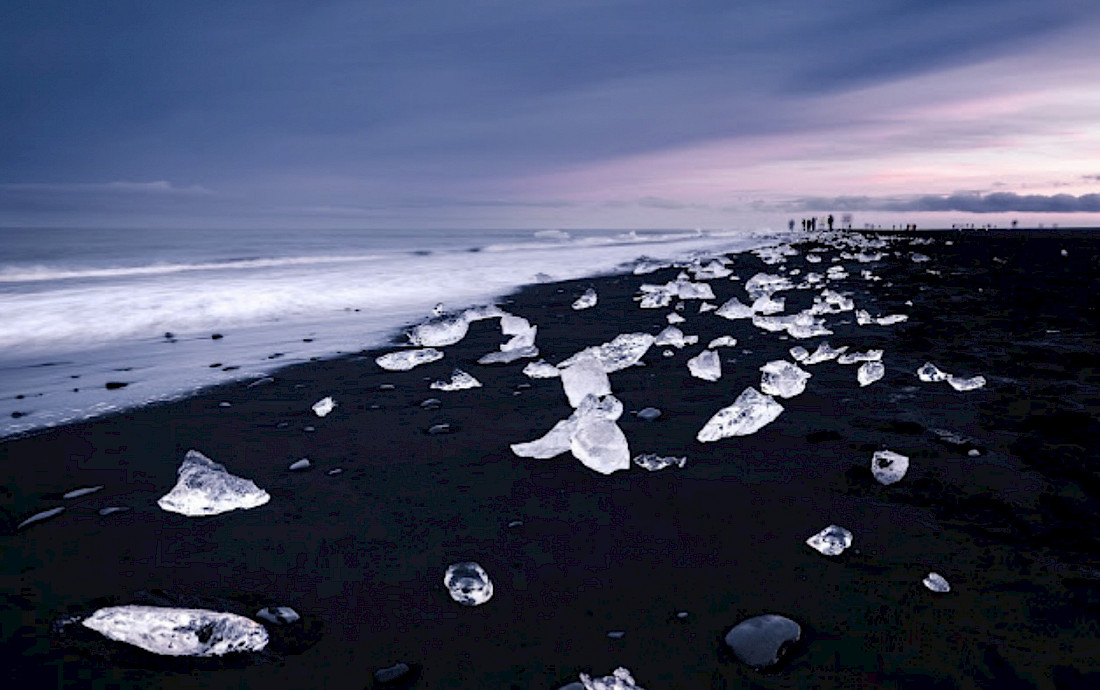
A winter landscape or a festival really shows how an area can transform itself. Look for an object or piece of scenery that stands out to you. At a festival or market look at the details of colorful stalls or brightly colored handcrafted items under twinkling lights. For nature photography, add color or natural interest to snow-covered fields and forest paths by framing them with an icy river, trees, stonewalls, rocks, or people. There is nothing more evocative than a bare branch etched against a deep blue winter sky that frames an interesting home, building, or cozy cabin. A framed shot gives an image depth and projects a feeling of the beauty of nature. Look for contrasts, patterns, colors, and lines that stand out in the snow or on a black sand beach - these are the things sure to draw the eye of the viewer.
Just Have Fun
Day or night, winter scenes are dynamic so just take the shot, and don’t be afraid to take a lot of photos…you can always edit them in the warmth and comfort of your room. Good lighting is key to good photos and early morning or early evening are the best times to shoot in the winter when there is plenty of contrast and shadows. We always recommend that you shoot RAW images because they will give you more ways to color-correct them. And, most importantly, don’t be a slave to your camera…put it down and enjoy the sites!